Getting Started with Entity Framework Code First
The documentation for the Entity Framework provides thorough introduction, in this post I start with the basic tutorial for code first with a view to setting up an application I can use to practice some technologies and techniques on in the future.
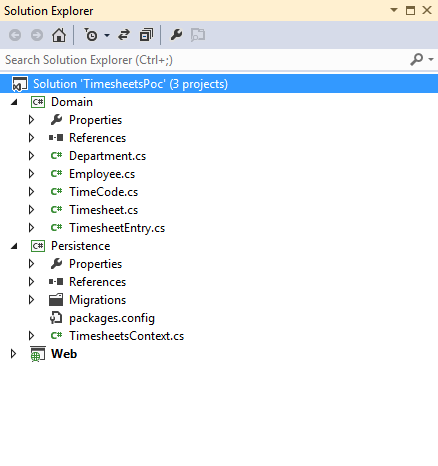
Normally I would split the applications domain classes from the context and migrations code giving rise to a Domain project and a Persistence project:
Normally I would split the applications domain classes from the context and migrations code giving rise to a Domain project and a Persistence project:
Creating a Domain Project
The domain project should have just the plain poco classes which represent the entities to be persisted to the database. This project HAS NO reference to entity framework, so when deploying across multiple tiers there is no requirement to deploy the Entity Framework libraries or the context class and the migrations code with the pocos. An example domain is shown below:Creating a Persistence Project
Next, create a Persistence project and install the entity framework using the package manager console. This is the project that will actually does the saving and retrieving of data.
install-package EntityFramework
Add a class to the Persistence project called TimesheetsContext and extend the Entity Framework DbContext class. This base class provides the functionality to save to the database. Now add a series of properties to the context class of type DbSet which are all of the classes from Domain as required. Note that if a class in Domain is not referenced either directly in the context class, or indirectly in one of the context child classes then it wont get persisted and the database wont know about it.
That's all you really need to be able to save and load objects from the database. The Entity Framework is installed and setup via the context class so if you add any objects to the appropriate DbSet and then call save changes on the context, then it will be persisted. The database will get created the first time the context is called.
Enable-Migrations
This will create a Configuration class inside a Migrations folder. To create a migration for your current domain model, call the add migration command from the package manager console. When running the Add-Migration script, the command needs to know the name the generated migration is to use, the startup project to get the connection string from and the project name where the context is:
Add-Migration -Name InitCreate -ProjectName Persistence -StartUpProjectName Web
When using the package manager console, the start up project selected in visual studio is used by default for StartUpProjectName and the Default project selected in the package manager console drop down is used for the Project Name. If these values are set correctly, you only need to use:
Add-Migration InitCreate
As this is powershell, you can find out more information about the commands using get-help:
Get-Help Add-Migration -full
update-database -TargetMigration 201404141340461_AddDepartmentEntity
This is a roll back if your database is currently on a later version. If your database is actually on an earlier version then in affect your rolling forward. The _MigrationHistory table in the database is used by EntityFramework to determine the current state of the database.
update-database -ProjectName Persistence -StartUpProjectName API
Setting up Migrations
Code migrations are used if you need to change the database somehow, by adding columns, data annotations, constraints or new entities. To enable migrations you simply call the appropriate command in package manager console (make sure your default project is set to Persistence):Enable-Migrations
This will create a Configuration class inside a Migrations folder. To create a migration for your current domain model, call the add migration command from the package manager console. When running the Add-Migration script, the command needs to know the name the generated migration is to use, the startup project to get the connection string from and the project name where the context is:
Add-Migration -Name InitCreate -ProjectName Persistence -StartUpProjectName Web
When using the package manager console, the start up project selected in visual studio is used by default for StartUpProjectName and the Default project selected in the package manager console drop down is used for the Project Name. If these values are set correctly, you only need to use:
Add-Migration InitCreate
As this is powershell, you can find out more information about the commands using get-help:
Get-Help Add-Migration -full
Rolling back Migrations
Migrations are designed to be rolled back and rolled forward. If you want to roll back to a particular version, you use the TargetMigration switch and specifiy the migration.update-database -TargetMigration 201404141340461_AddDepartmentEntity
This is a roll back if your database is currently on a later version. If your database is actually on an earlier version then in affect your rolling forward. The _MigrationHistory table in the database is used by EntityFramework to determine the current state of the database.
Explicitly update Migrations
Usually I use the IDE to update the database with new migrations. The update-database command reads the default project as the migrations project, and the startup project as the, well start up project. You can do this from the command line using the following command:update-database -ProjectName Persistence -StartUpProjectName API

